How to Make Milk Kefir and its Health Benefits
This post may contain one or more affiliate links, which means I will get a small commission when you buy a product via the provided link at no cost to you! As an Amazon Associate, I earn from qualifying purchases. See my full disclaimer here.
Thinking about making your own milk kefir but not sure where to start? In this post, I’ll explain the basics of maintaining milk kefir grains and keeping these lifelong companions happy and healthy so you can start making your own kefir. I also cover some of the health benefits these little milk kefir grains provide!
Save this recipe for later!

What is Milk Kefir?
Milk kefir is a centuries-old fermented, drinkable yogurt. It is known for its probiotic-rich goodness and numerous health benefits. The magic behind this healthy, tangy, fermented milk drink with a little fizz lies in its star ingredient: milk kefir grains (also known as milk kefir, grains of the prophet, or simply kefir).
Want to make sure your milk kefir turns out great every time?
Grab my free beginner’s guide and checklist before you get stared!
Click here to download
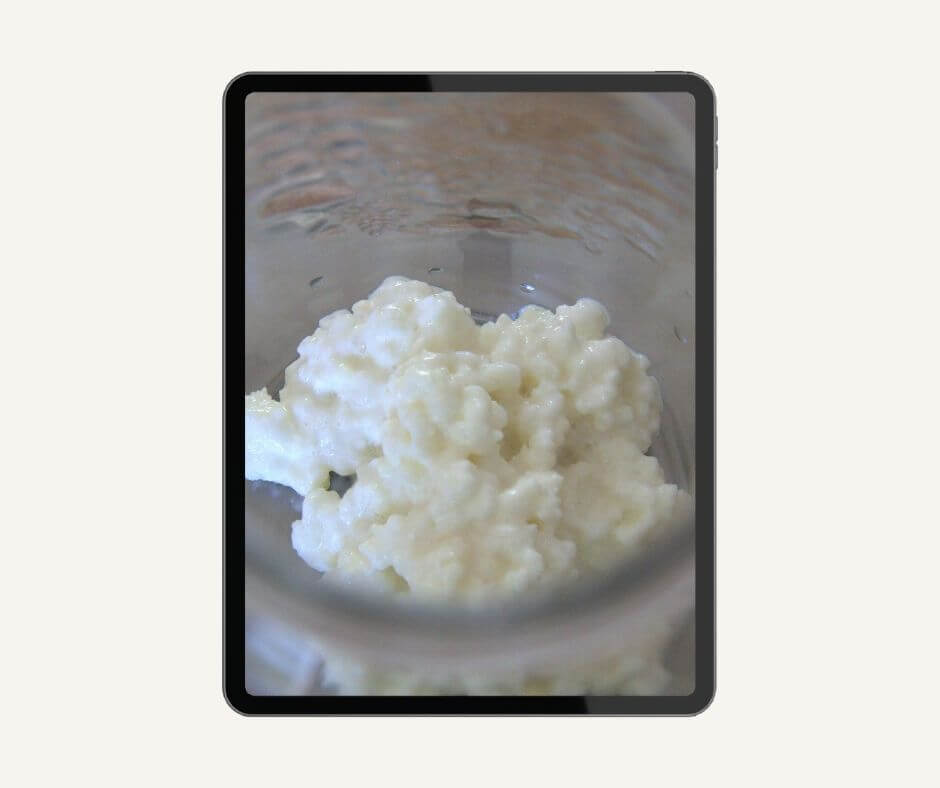
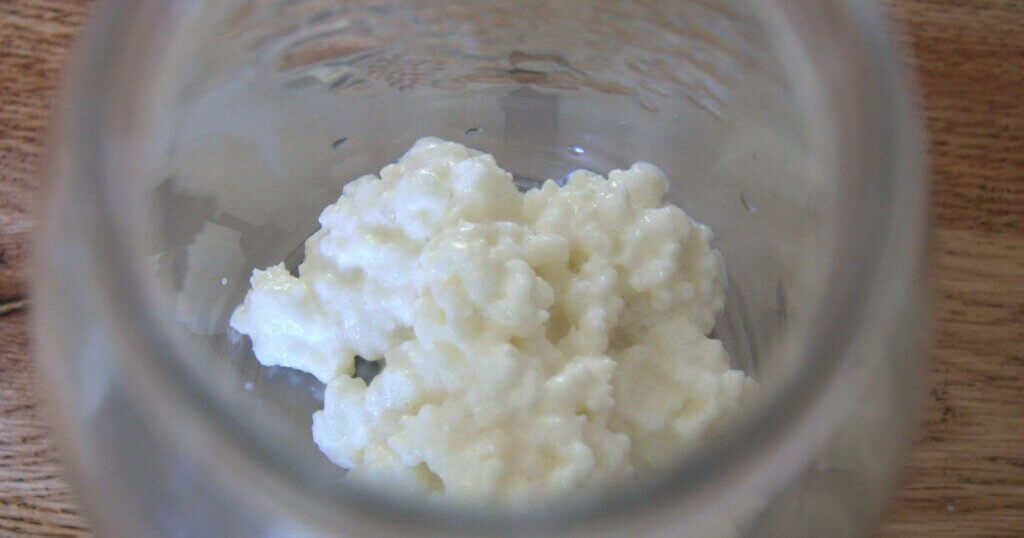
Milk Kefir Grains
Milk kefir grains are not actual grains, but rather a symbiotic collaboration of bacteria and yeast. They look like small, cauliflower-like clusters and can range in size from a pea to a walnut. These grains contain a diverse community of beneficial microorganisms that transform milk into kefir through fermentation. The gelatinous clusters of beneficial bacteria and yeast will provide a continuous supply of homemade kefir.

Care and Attention to Your Kefir Grains
However, like any living culture, milk kefir grains require care and attention to thrive. Homemade milk kefir is made by adding, preferably raw organic milk, to milk kefir grains. These grains are made up of various microorganisms, such as bacteria and yeasts, and consist of proteins and polysaccharides.
These microorganisms work together to create the most favorable environment in which they can both survive. The yeasts provide the necessary vitamins for the bacteria to grow in this collaboration. In turn, the bacteria produce an acid that the yeast needs for survival.
The acidic environment that is formed by these organisms prevents pathogens and/or foreign bacteria from entering. This makes milk kefir an easy-to-maintain life partner that can help you balance and maintain your inner health. Adding milk to these milk kefir grains will make them begin to grow. So, if you take good care of them, the grains only need to be purchased once.
Next to the acidic environment, carbon dioxide is formed. This will give your homemade kefir a light fizz. I love it!

Why is Milk Kefir Good for You?
Probiotics for your gut!
Consuming milk kefir is healthy, among other things, because it is loaded with beneficial bacteria and yeasts. These bacteria and yeasts in this drinkable yogurt have a positive effect on your gut and make milk kefir a probiotic. When you consume milk kefir, the lactic acid bacteria survive the stomach acid and end up in the intestines. Here, it promotes a healthy gut flora by balancing the beneficial and harmful bacteria.
This balance covers the entire intestinal wall with bacteria, preventing harmful bacteria from multiplying because there is simply no space and nutrients left for them. Furthermore, these beneficial microbes aid in digestion, support the immune system, and may alleviate digestive issues like constipation, bloating, and irritable bowel syndrome (IBS).
In short, by keeping your gut flora healthy, you ensure that your immune system can function at its best. This means you are less likely to get sick or recover faster if a pathogen does manage to infect you.
Vitamins and Minerals
Because the bacteria and yeasts ‘digest’ the milk, and thereby break it down into several substances, milk kefir has another great health benefit. It contains various vitamins, minerals, and amino acids such as calcium, magnesium, iodine, and iron, vitamins B(1, 2, 6, 8, and 12), C, D, and K2, and various enzymes. In short, milk kefir is a particularly good milk drink that can support your body in staying healthy.
What Supplies Do You Need to Make Milk Kefir?
This post may contain one or more affiliate links, which means I will get a small commission when you buy a product via the provided link at no cost to you! As an Amazon Associate, I earn from qualifying purchases. See my full disclaimer here.
Why Should You Use a Plastic Strainer?
The good bacteria and yeast in milk kefir grains don’t like untreated metal. The sour grains and the metal create an electrical charge. This ultimately might have an effect on the health of your kefir grains. To keep them happy and in top condition, I use a plastic sieve and a plastic or wooden spoon.
Although there is a bit of discussion about this topic, I would still recommend using a plastic strainer. Especially if you want to make milk kefir for a long time.
If you’re just starting out, it might not be necessary to get a special plastic strainer at ones. But if you think after a while, heck yeah, I want to make milk kefir for a long time, then get the plastic strainer, just to be sure.
Why Should You Use a Jar With an Airlock?
Well, to be frank, you don’t have to use a jar with an airlock. When I just started out, I got myself a starter pack which had this custom-made jar with a lid that had a hole for an airlock (The kefir shop (Dutch shop) makes this lid to size so that an airlock fits on top). Now, we upped our game, and that jar is much too small (we currently, June 2025, make a liter per day).
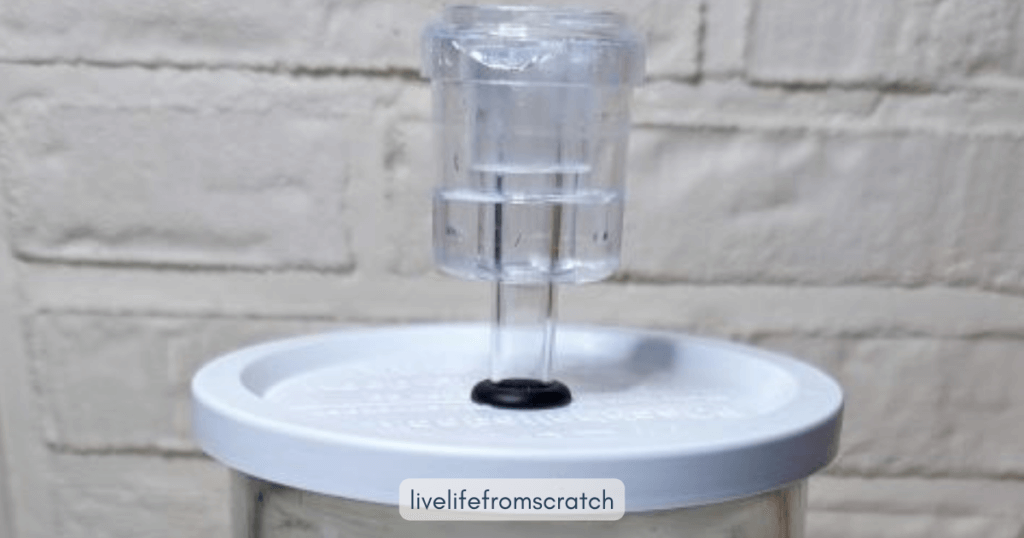
Well then, Renee, what are you using now? For one batch we use a regular, good old mason jar with a screwed on canning lid, we just don’t screw it so its not airtight. For the other batch, we use a fermentation lid; both lids do their job perfectly!
How to Make Milk Kefir
Which Milk Should You Use?
Organic, whole milk is ideal, as it provides essential nutrients and fats for the kefir grains to thrive. Typically, any variety of organic milk works well for making kefir. This encompasses cow’s milk, goat’s milk, sheep’s milk, horse milk, and more.
Personally, I have a preference for raw milk sourced from our nearby local farmers. It’s advisable to steer clear of ultra-pasteurized milk. It might not be as conducive to the thriving growth of kefir grains.
What About Non-Dairy Milk?
I haven’t tried it yet, but you can experiment with non-dairy milk, such as soy milk, almond milk, coconut milk, oat milk, rice milk, and so on. Because the kefir grains feed on the lactose in the organic milk, you will need to feed your grains with sweetened non-dairy milk.
If you want to try this, I recommend using only a small portion of your kefir grains so that if they don’t react well, you still have healthy kefir grains on hand.
How the Fermentation Process Works
Milk kefir can be used in different ways. It can be consumed on its own as a refreshing drink or used as a base for smoothies and other beverages. It can also be used instead of buttermilk or sour cream in recipes, giving dishes a tangy flavor and probiotic benefits.
Furthermore, you can use a tea towel or cheesecloth to make a kind of kefir cheese from your kefir. You pour your kefir into the cloth and hang it above a bowl. Because a lot of moisture will come out of the kefir, you will get a thick, sour substance.
How Kefir Grains Ferment Milk
Kefir grains thrive in a temperature range of 68 °F to 85 °F (20 °C to 30 °C). Fermenting at the lower end of this range will result in a milder taste. Higher temperatures will yield a tangier kefir. Keep in mind that fermentation time may vary depending on temperature, so monitor the process until you reach your desired taste. The higher the temperature, the faster the fermentation will proceed, and the earlier you should harvest your fermented milk drink!
The process of the fermentation of milk by the milk kefir grains
- It may be obvious, but the process begins by adding kefir grains to organic, fresh (raw) milk.
- During the first fermentation, the kefir grains start fermenting the lactose (milk sugar) in the milk. Lactic acid bacteria present in the kefir grains convert lactose into lactic acid, leading to a decrease in pH and the characteristic tangy flavor of kefir.
- As fermentation progresses, the yeast in the kefir grains produces carbon dioxide gas, creating a slight fizz in the kefir.
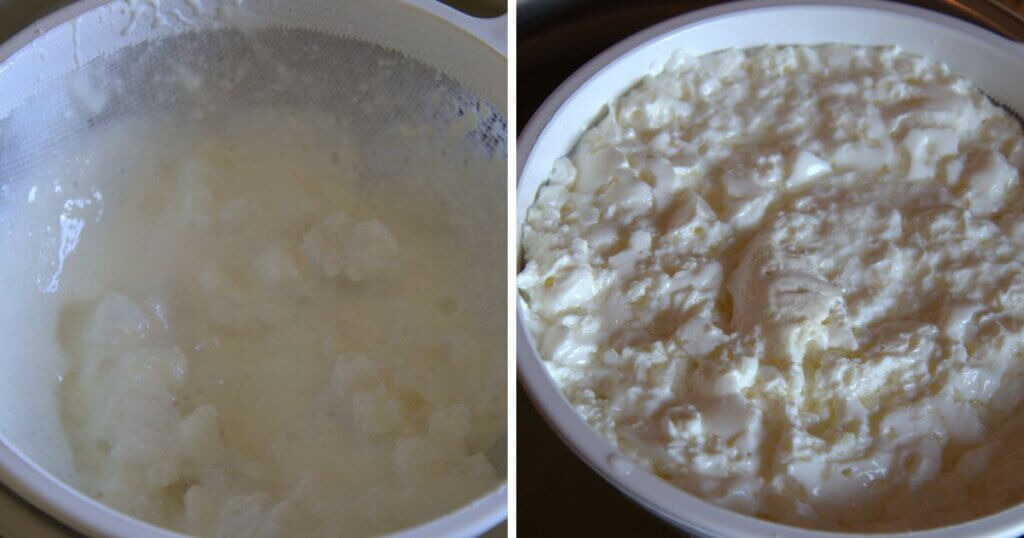
- Over time, the proteins in the milk undergo partial breakdown due to the enzymatic action of the kefir grains. This results in the formation of curds, giving kefir its creamy and slightly thick consistency.
- As the kefir ferments, it may start to separate into curds and whey. Whey is a clear, slightly yellowish liquid that contains water-soluble components and is rich in minerals and whey proteins.
- The longer the fermentation period, the tangier and more pronounced the flavor of the kefir becomes. The texture may vary based on several factors. It could depend on the type of milk used, the temperature of fermentation, and the duration of fermentation.
- Once the desired fermentation level is reached, the kefir grains are separated from the liquid kefir. The grains are then used to inoculate a new batch, while the fermented kefir is ready for consumption.
Keep this fermentation process in mind when making your own kefir. If you like it a bit more tangy or just a bit less, you can twist and tweak with the fermentation time or temperature.
Making milk kefir is very easy. You don’t need high-tech kitchen equipment. The only thing this sour, but lifelong, partner of yours asks for is a little bit of your time.
My Step-by-Step Milk Kefir Routine
My easy and simple milk kefir recipe goes as follows:
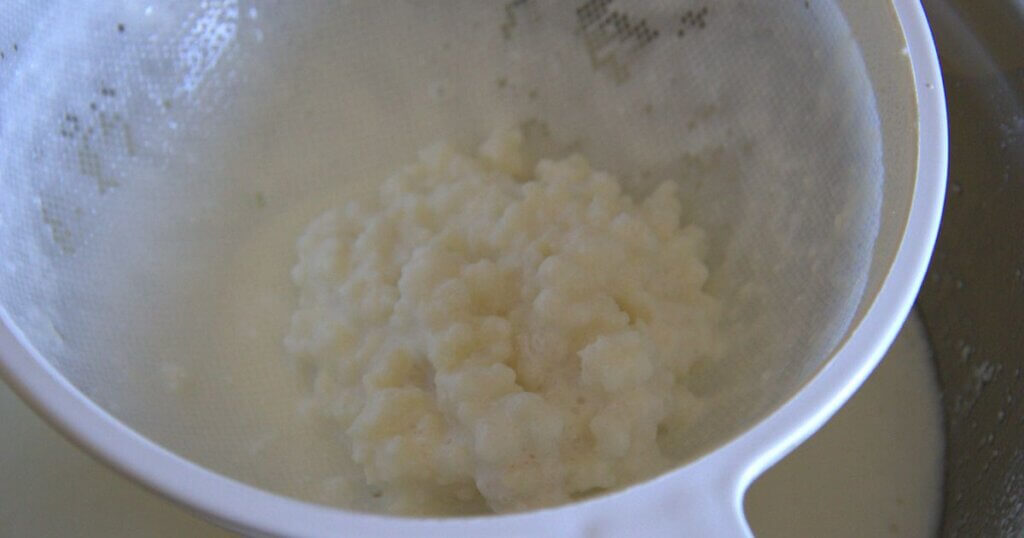
Step 1:
In the evening between 8 and 10, whenever the boys are in bed and I have a moment to myself, I empty my kefir jar in a plastic strainer. I catch the milk kefir in a large bowl, pot, or pan.
Step 2:
After all the milk kefir has passed through the strainer, I rinse out the empty jar with warm water and dry the jar with a clean tea towel on the outside of the jar.
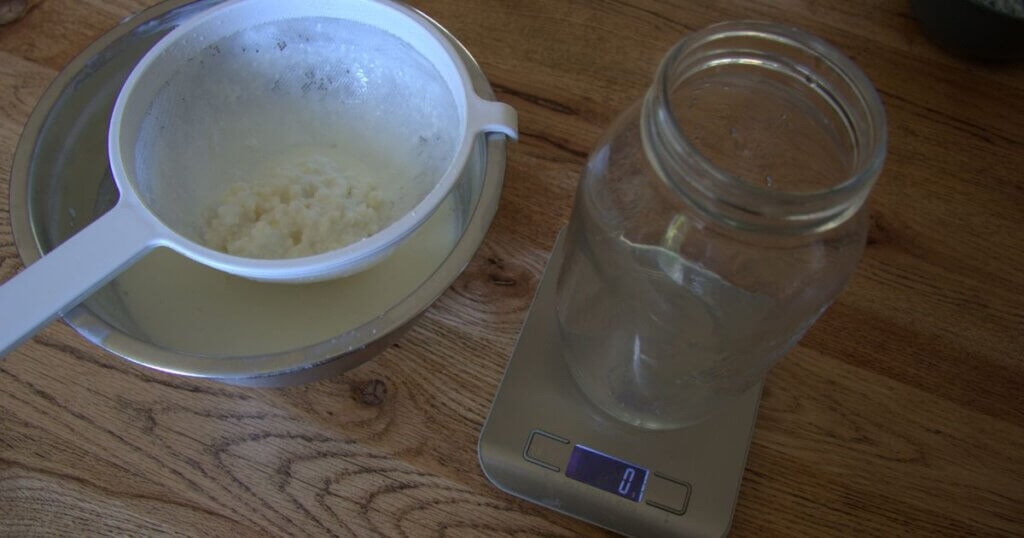
Step 3:
I place the rinsed and dried Weck jar on the kitchen scale and tare it so it’s set to 0 g.
Then, I pick up the pot and try to pour the kefir grains back into the pot without spilling.
Step 4:
Once the kefir grains are back in the pot, I add enough milk depending on how many kefir grains I have. The ratio should be about 1 g kefir grains/10 g milk.
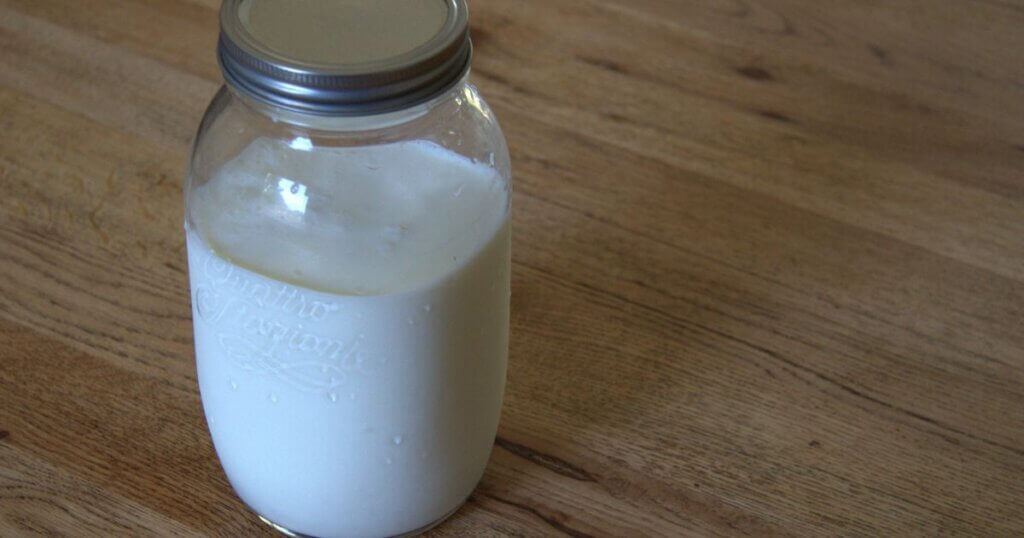
Step 5:
After enough milk has been added, I seal the jar with the airlock (or a loose-fitting lid) and place it back on the kitchen counter. After about 48 hours, I will start this process again, at step 1.
Tip: Check out my YouTube video where I explain my milk kefir routine!
my milk kefir routine on Youtube:
Feeling unsure about your first batch?
My free printable walks you through the most common mistakes (and how to fix them), so your kefir grains stay healthy from the start.
Grab the guide here!
What to Do With Your Finished Kefir
Milk kefir can be used in different ways. It can be consumed on its own as a refreshing drink or used as a base for smoothies and other beverages. It can also be used instead of buttermilk or sour cream in recipes, giving dishes a tangy flavor and probiotic benefits.
Furthermore, you can use a tea towel or cheesecloth to make a kind of kefir cheese from your kefir. You fill your cloth with the kefir and hang it above a bowl. Because a lot of moisture will come out of the kefir, you will get a thick, sour substance.

How Should You Handle Your Recently Harvested Milk Kefir?
Once you’ve obtained the fresh batch, you could drink it or process it further. If you want to process it further, you can, for instance, make it into a delicious smoothie with strawberries or other fruit!
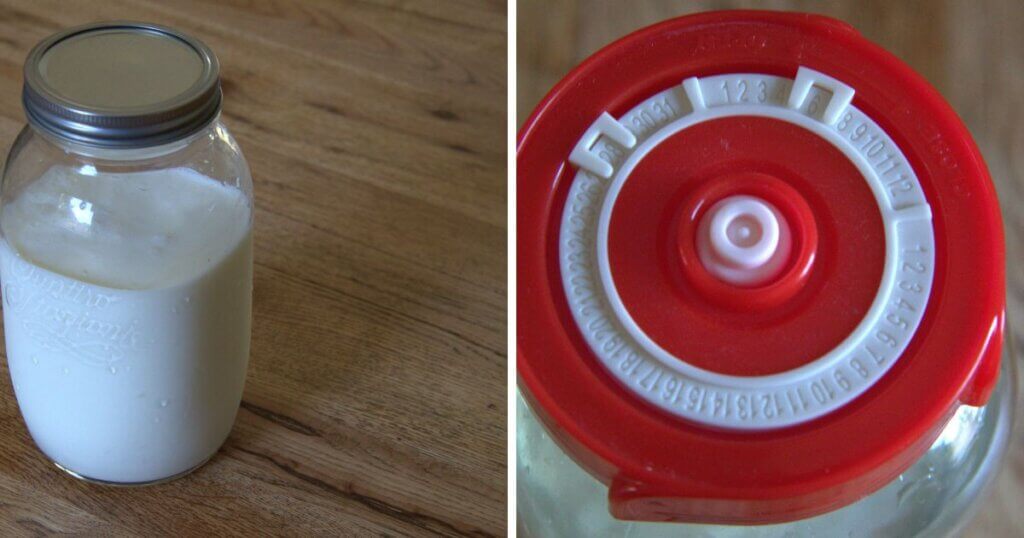
Or, you could transfer it into an empty milk bottle and place it in the fridge for a second round of fermentation. After this second fermentation, your homemade kefir will be ready to enjoy the following day.
Tips, Troubleshooting, and Fun Facts
- The name “kefir” allegedly is translated from the Turkish word “keyif” which means pleasure, joy, or delight.
- To keep your milk kefir grains healthy, they need a constant supply of fresh milk. This means you should ferment a new batch every 24 – 48 hours.
- When I don’t have enough fresh milk at home or don’t have time to refresh the milk kefir, I fill the jar with milk and put it in the fridge. This slows down the fermentation process, allowing the milk kefir to remain for up to 48 hours instead of 24 hours outside the fridge.
- If you don’t have an airlock on hand, you can also use a cloth and a rubber band, or loosely screwed cap to cover the jar.
- You can let the milk kefir ferment for another 1 to 2 days in a bottle after you strain the kefir grains (whether in the fridge or not depends on the ambient temperature). To prevent too much pressure from building up, I loosen the cap every day.
- A rule of thumb: you need 100 grams of milk kefir grains for one liter of milk, or 1 cup of milk kefir grains for 10 cups of milk.
- Do not let your kefir grains come into contact with untreated metals like iron, copper, aluminum, and such. Untreated metals can damage the kefir grains. Use a plastic or stainless steel strainer.
- Kefir grains thrive through a symbiotic partnership of various bacteria and yeasts. To maintain their health, ensure your hands and utensils are thoroughly clean during handling to prevent potential contamination.
- It never happened to me, but if your kefir grains change color or develop an off-putting odor, it’s a sign that something is amiss. As a rule of thumb, I just don’t consume any fermented foods or drinks when I don’t like the taste and/or smell of them. You might have fermented the milk too long, or the temperature was too high. Strain the kefir grains and provide them with a fresh batch of milk; repeat until the smell or color is changed to normal.
- The enzymes present in kefir grains help break down lactose. This process will make the milk kefir easier to digest for individuals with lactose intolerance. It can be a valuable source of nutrients for those who would typically struggle with dairy consumption.
- By making milk kefir, your grains will grow, and grow, and grow, and yes, grow even more. After a while, you will have so many that, luckily, you’ll have lots of options to handle all these kefir grains. You can give or sell them to other people who want to make their own milk kefir, eat them, throw them away, or store them in your freezer as a backup for when something happens to your kefir grains.
Finally, milk kefir is a healthy and delicious choice for people looking to improve their gut health. It’s easy to make at home and can be used in various ways. With its many possible health benefits, milk kefir is worth trying!
Milk Kefir
Print Recipe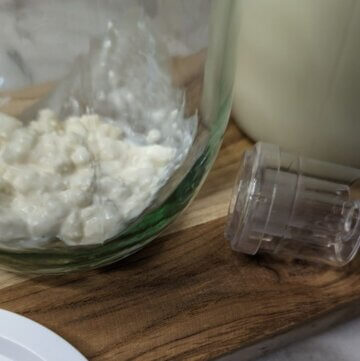
Equipment
- 1 strainer preferably a plastic one
- 1 Large bowl
- 1 bottle optional
- 1 mason jar with a loose lid or airlock
Ingredients
- 100 g kefir grains
- 1000 g milk organic whole milk or raw milk
Instructions
- Empty the mason jar into a (plastic) strainer, catch the milk kefir in a large bowl, pot, or pan.
- After all the milk kefir has passed through the strainer, rinse out the empty jar with warm water and dry the jar with a clean tea towel on the outside of the jar.
- Once the kefir grains are back in the pot, add enough milk (1000 grams of milk will make about 1 liter of milk kefir).
- After enough milk has been added, I close the jar with the airlock and place it back on the kitchen counter.
- After about 48 hours, repeat this recipe for a new batch of milk kefir!
Notes
- The ratio of kefir grains to milk should be about 1 to 10. So, for every gram of kefir grains, you should add 10 grams of milk. In this recipe, for 1 liter of milk kefir, you should use 100 grams of kefir grains.
- Fermentation processes are dependent on multiple factors. One of which is the temperature. Do note that in winter, you might need to ferment your kefir grains longer than in summer.
- If your kefir smells yeasty or like beer, reduce the fermentation time slightly.
- Want a fizzier kefir? Do a second ferment! Add your milk kefir to a sealed bottle and let it sit for another 12 to 24 hours.
FAQs About Milk Kefir
Fermentation Recipes You Might Like!
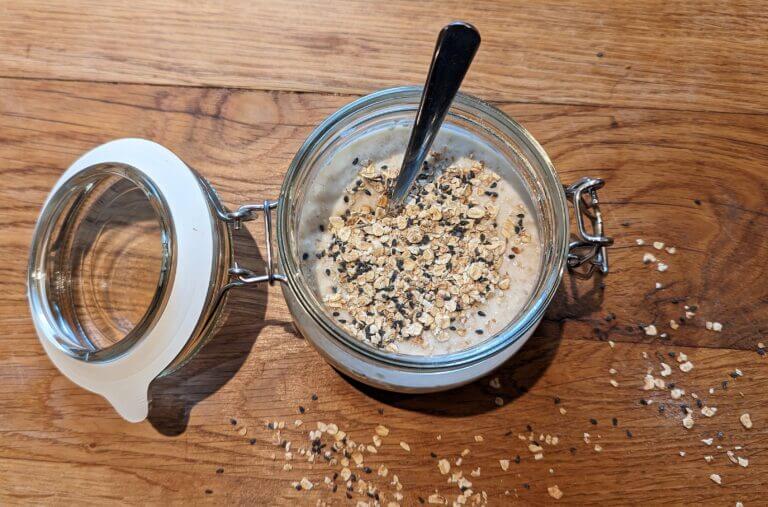
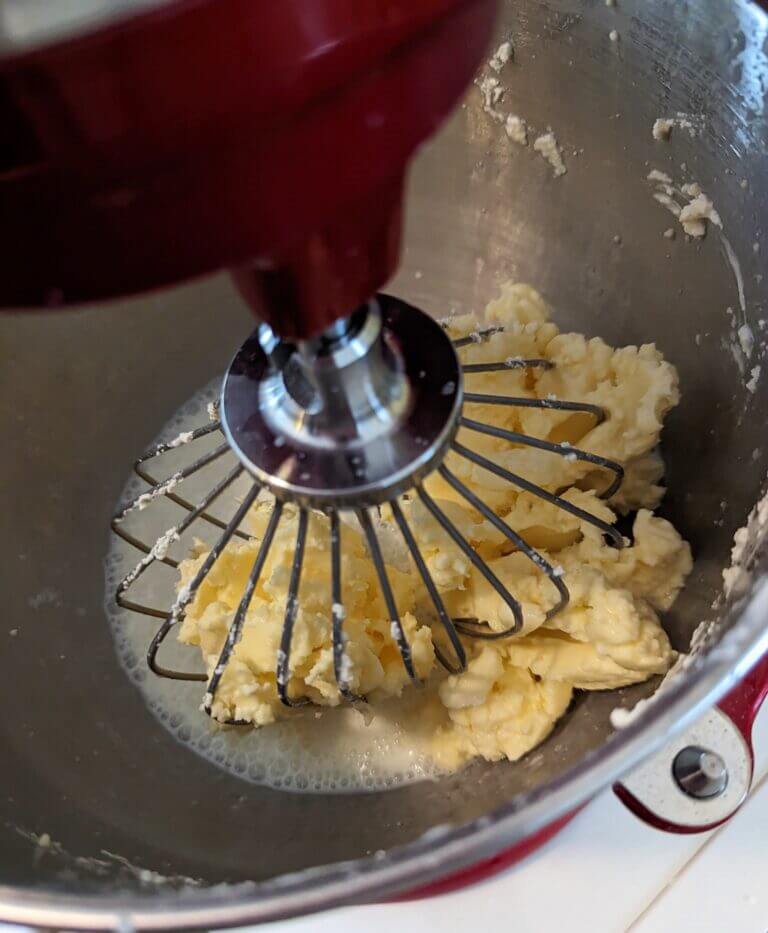
If you love making milk kefir, there’s a good chance you’ll enjoy these other easy fermentation recipes too. From creamy homemade yogurt to fizzy water kefir and tangy cultured butter, these recipes are simple to make and full of probiotic goodness. I even use milk kefir to ferment my overnight oats for an extra nourishing start to the day. Try one—or all—of them next!


This post may contain one or more affiliate links, which means I will get a small commission when you buy a product via the provided link at no cost to you! As an Amazon Associate, I earn from qualifying purchases. See my full disclaimer here.


I love all things fermented! This is an excellent instructional resource for milk kefir. Thanks for sharing!
Hi Jeanie-Marie, thank you for your kind words! I’m kind of a new kid on the block when it comes to fermenting but until now I just love everything about it!
Hi-Can you grow your own grains? If not, where do you recommend buying them? TIA!
Hi Kathy, the kefir grains, allegedly, were originally formed when nomads stored their raw milk in goatskin bottles a few thousand years ago. Over time the kefir grains, or symbiotic bacteria and yeasts were formed and became the kefir grains as we know to date.
As I live in the Netherlands and don’t have access to my own goatskin bottles I just bought my kefir grains from a webshop (www.kefirshop.nl). This shop was recommended by the author of a fermenting recipe book (Christian Weij) that I use often, and thus consider a trusted source in my opinion.
I don’t know where you live but I recommend you search on the internet for a source of kefir grains with lots of positive reviews. If you live nearby I can send you some if you’d like!
I’ve been making milk kefir for awhile, but I learned some things about the process from this article! Thanks for sharing!
Hi Carol! Good to hear that, even though you’re already known with kefir, there were still some interesting unknown facts! I also stumbled upon a couple of things I didn’t know yet when researching kefir more in depth. I always love the lore behind things!
I love kefir, and I start my kids on it as soon as possible so it doesnt taste “odd” to them. They love it in smoothies! I enjoyed reading the fun facts about it!
Hi Kathleen! I fully agree with introducing it to our kids at a young age so they get used to the taste. We can not imagine kefir not being in our daily diet anymore! It is such a great addition.